Installing ChandelierTips: A Complete Guide by Metavaya
Chandeliers are a timeless addition to any home, offering both style and function. Whether installed above a kitchen island, a dining table, or in a hallway, Chandelier can transform your space. At Metavaya, we want you to feel confident throughout the installation process. Follow our step-by-step guide, and you’ll soon enjoy a beautifully illuminated room!
Step 1: Preparation
Before starting, ensure you have all the tools and follow safety protocols.
Tools You’ll Need:
Ladder, pliers, wire strippers, screwdrivers, power drill(optional), a drill bit(optional)

Safety First:
Turn Off Power: Shut off power at the breaker panel for the room you’re working in.
Test for Power: Use a voltage tester on the wires or fixture to confirm no current is flowing.
Remove the Old Fixture: Carefully unscrew and disconnect the existing light. Retain screws or mounting hardware, as they may be helpful for the new fixture.

Step 2: Assemble the Chandelier
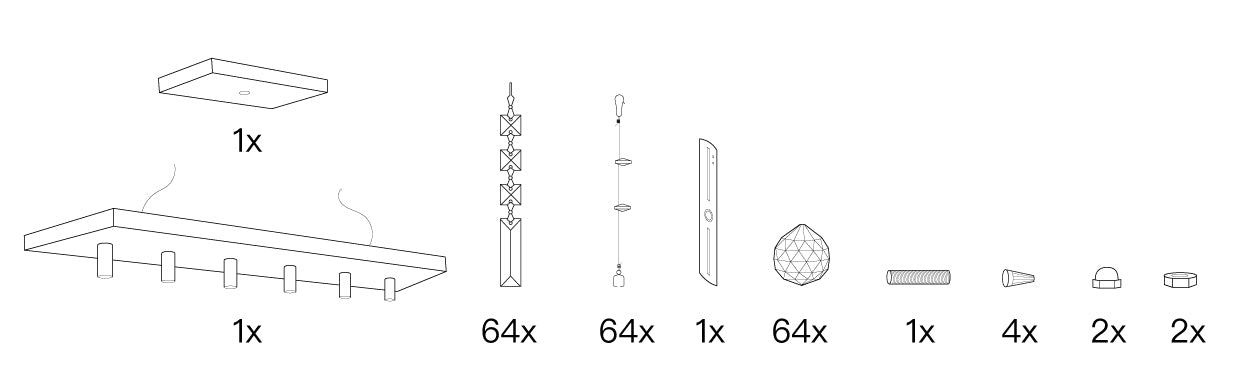
Lay out all parts and assemble your fixture according to the manufacturer’s instructions.
Organize Components: Spread all parts on a flat surface for easy access.
Pre-Assemble Parts: Attach rods, chains, or decorative elements, and set the hanging height to your preference.
Secure Decorations: Attach shades, crystals, or other decorative elements while on the ground to simplify installation.
Step 3: Install the Mounting Bracket
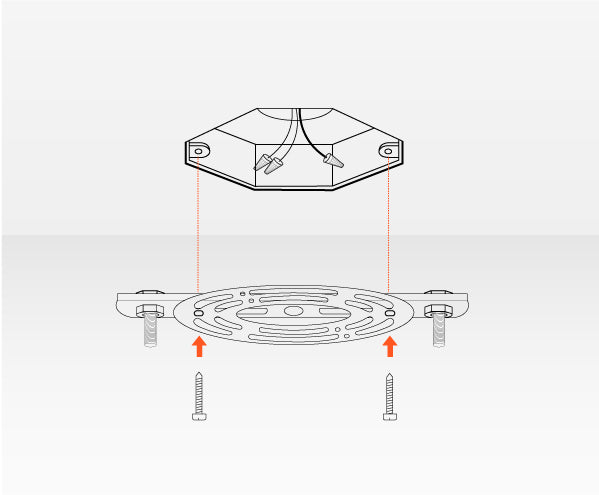
The mounting bracket is vital for a stable and secure fixture.
Attach the Bracket: Secure it to the ceiling junction box using screws provided.
Check Stability: Gently pull on the bracket to ensure it’s firmly in place. For heavier fixtures, use a fan brace or additional support.
Step 4: Connect the Wiring
Wiring is a crucial step—take care to follow these guidelines:
Identify Wires:
Black: Live/hot wire
White: Neutral wire
Green/Bare Copper: Ground wire
Wiring Instructions:
Ground Wire: Connect the pendant’s ground wire to the junction box’s ground wire and secure with a connector.
Neutral Wires: Twist the white wires together and secure with a wire connector.
Live Wires: Connect the black wires and secure them.
Double-Check Connections: Tug each connection gently to ensure they are secure and no bare wires are exposed.
Tip: If you’re unsure about wiring, consult a licensed electrician.
Step 5: Attach the Chandelier
Mount your fixture onto the bracket.
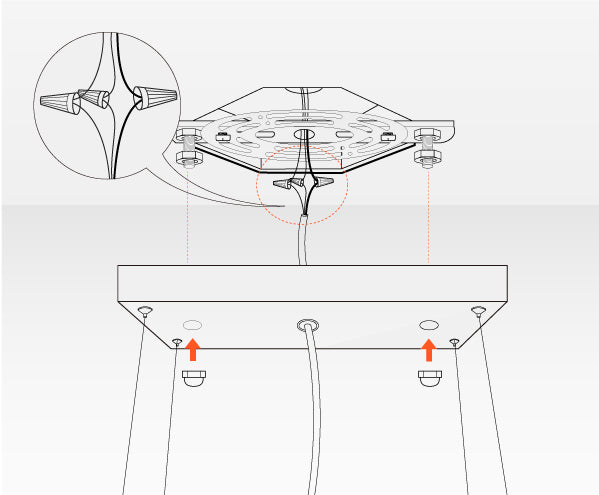
Secure the Fixture: Align the pendant with the mounting bracket and use screws or nuts to fasten it.
Adjust Alignment: Check that the pendant hangs level and at the correct height before tightening fully.
Step 6: Finalize Setup
Add the finishing touches to your fixture.
Insert Bulbs: Use the recommended wattage and type for your Chandelier.
Attach Shades or Covers: Secure any shades or covers not attached earlier.
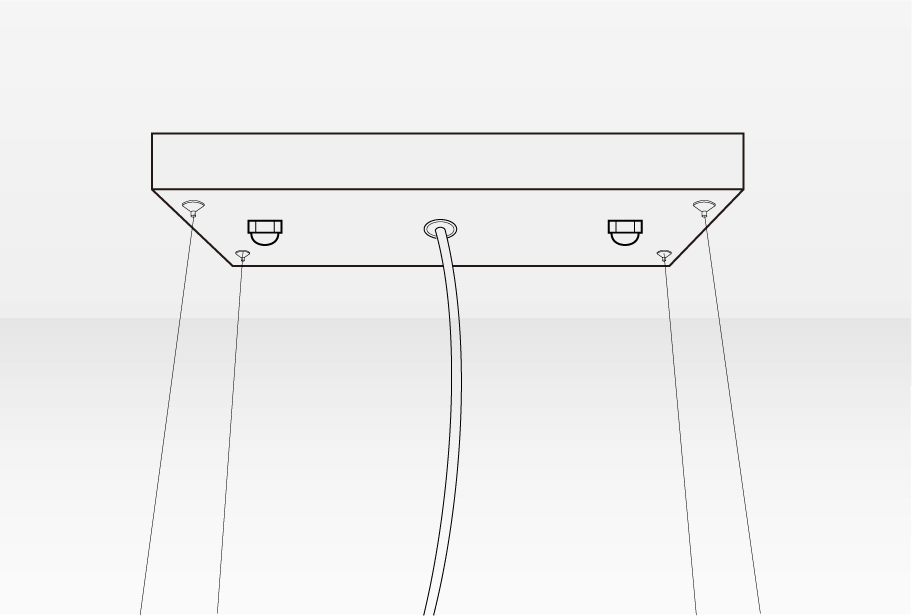
Stability Check: Ensure all components are secure and the fixture hangs level.
Step 7: Test Your Light
Restore power and enjoy your new lighting!
Restore Power: Switch the breaker back on.
Flip the Switch: Turn on the Chandelier to check functionality.
Make Final Adjustments: Step back to assess height and alignment, and make any necessary tweaks.
Additional Tips for Chandelier Installation
Optimal Heights:
- Kitchen Island/Countertop: 30–36 inches above the surface.

- Dining Table: 30–34 inches from the table to the fixture bottom.

- Hallways/Open Spaces: Maintain at least 7.5 feet of clearance from the floor.

Support for Heavy Fixtures:
Ensure your ceiling junction box and bracket can support the pendant’s weight. For heavy fixtures, use additional reinforcement like a fan brace.
Professional Assistance:
If you’re unsure about wiring or want to ensure compliance with building codes, hire a licensed electrician for peace of mind.
Step 8: Check
Congratulation, you have completed the installation for your chandelier! One last thing to do is to check it from a distant just to make sure that the chandelier is leveled and at proper height. Make additional small adjustment as needed. After ensuring safety, you can turn on your house’s power switch and the light switch for the chandelier. Now you can enjoy the beautiful chandelier that you just installed for your home.
We hope this blog will be able to provide you an overall view about the chandelier’s installation process as well as step by step guidance when you are doing the installation. If you have any questions, feel free to contact us and we are always here to help!