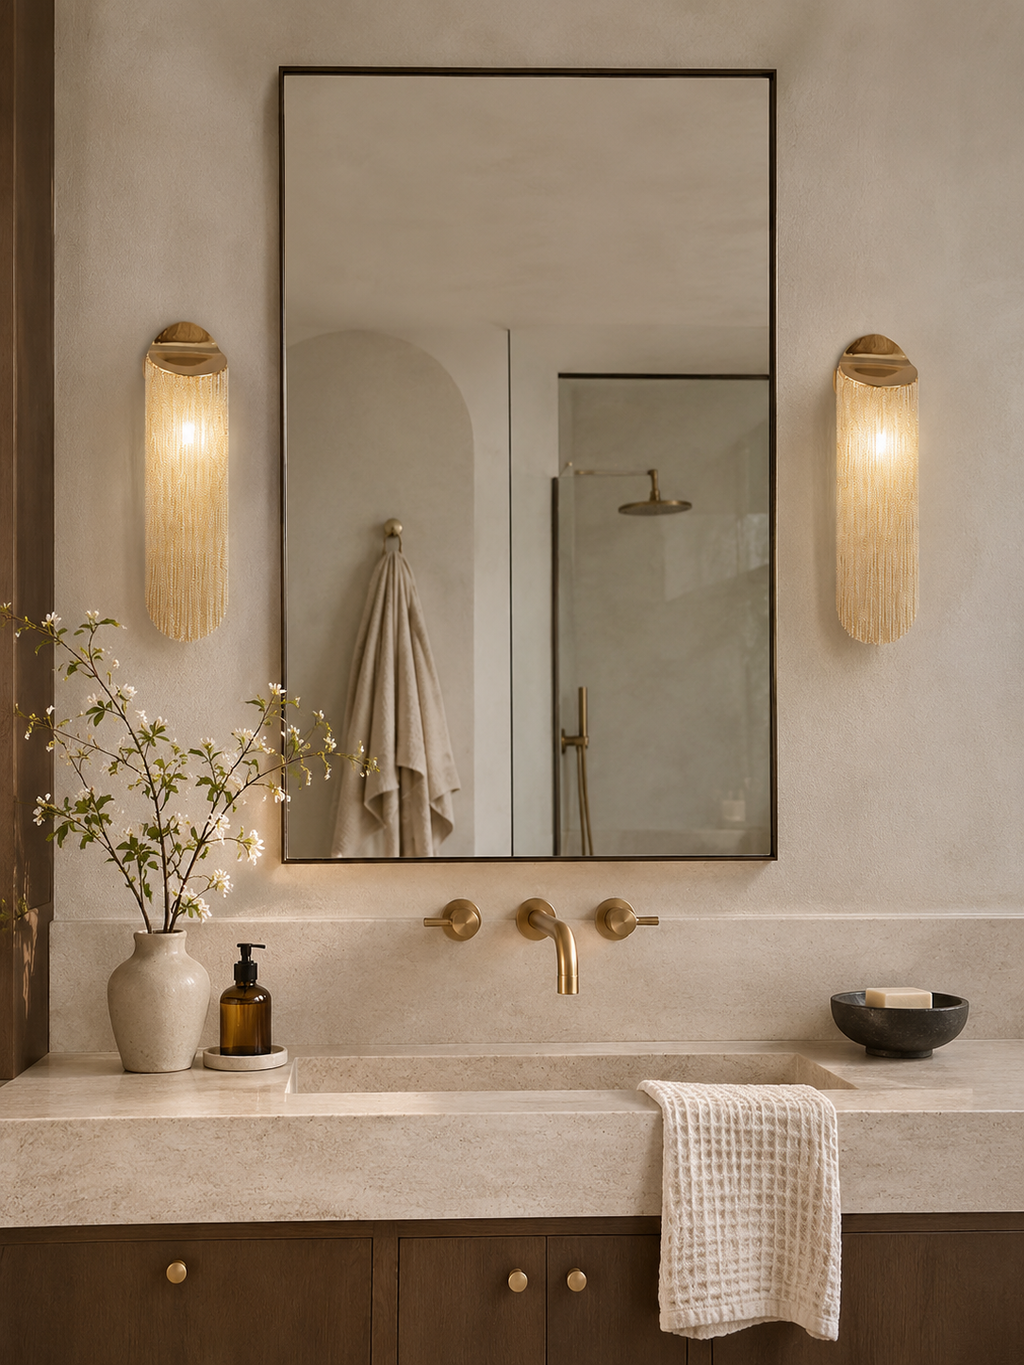
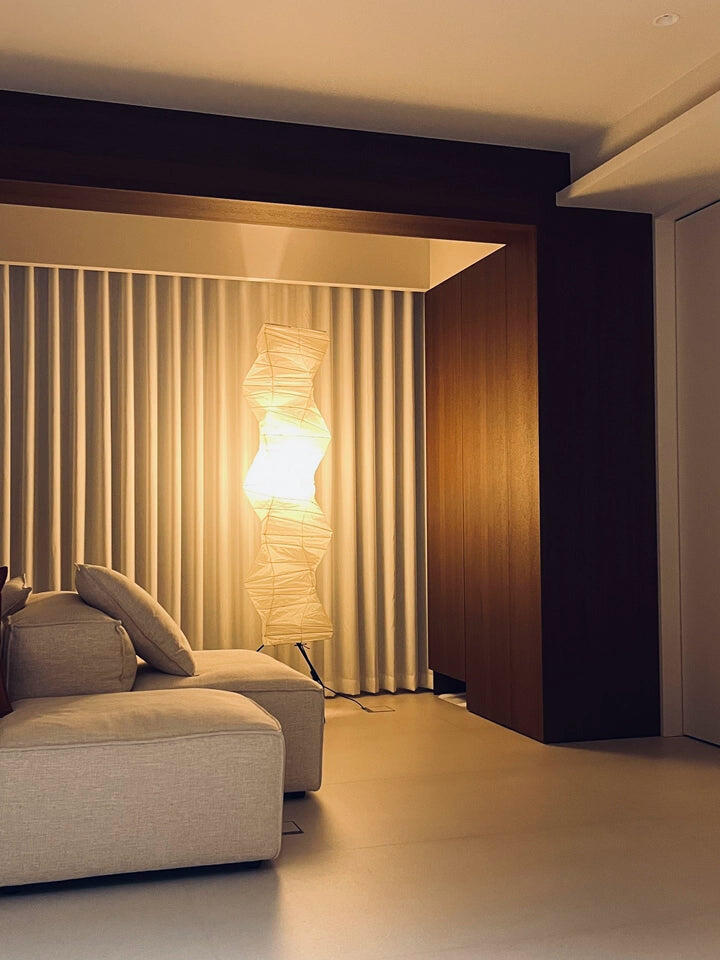
Ø 17.7″ · 6 bulbs
Ø 45 × H 32 cm. The one for an entry, a hallway, a landing or a small bedroom — tight enough not to crowd a narrow ceiling, and the deepest drop of the three relative to its width, so the tiers still read clearly from underneath.
Guarantee safe & secure checkout

Spend More, Save More — Up to 20% Off
Click a discount code to copy · Apply at checkout
Thank you for your purchase. We hope you are happy with your purchase. However, if you are not completely satisfied with your purchase for any reason, you may return it to us for [a full refund], or [an exchange]. Please see below for more information on our return policy. Please see below for more information on our return policy.
RETURNS
All returns must be made within [30] days of the delivered date. All returned items must be in new and unused condition, with all original tags and labels attached.
RETURN PROCESS
To return an item, please email customer service at support@metavaya.com to obtain a Return Merchandise Authorization. place the item securely in its original packaging, and mail your return to our warehouse.
Please note, you will be responsible for all return shipping charges.
REFUNDS
After receiving your return and inspecting the condition of your item, we will process your [return] or [exchange]. Please allow at least [7] days from the receipt of your item to process your [return] or [exchange]. Refunds may take 1-2 billing cycles to appear on your credit card statement, depending on your credit card company. We will notify you by email when your return has been processed.
EXCEPTIONS
The following items cannot be [returned] or [exchanged]:
For defective or damaged products, please contact us at the contact details below to arrange a refund or exchange.
Please Note:Sale items are FINAL SALE and cannot be returned.
If you have any questions concerning our return policy, please contact us at: support@metavaya.com
At Metavaya, we provide comprehensive customization services to ensure your lighting perfectly fits your space and style. Whether you prefer modern minimalism, industrial chic, or timeless elegance, we are here to craft unique lighting fixtures that bring out the best in your space.
Start by connecting with our experts via live chat or email and share the following details:
We’re here to help you every step of the way!
Q: How much does custom lighting cost?
A: Pricing depends on the complexity of the design, materials, and dimensions. Contact us for a personalized quote.
Q: What is the production and delivery time?
A: It typically takes 4 to 7 weeks, depending on the order's complexity.
Q: Do you offer global shipping?
A: Yes, we provide worldwide shipping, with fees calculated based on destination and order size.
Contact us today to begin creating your bespoke lighting fixture, and let Metavaya illuminate your space with brilliance and style!

Important Note: The features described below apply generally to our lighting fixtures. They do not guarantee that the specific product you are viewing includes these features. Please refer to the Description section of the product page to verify its functionalities.
Dimmable Version:
Three-Color Switch-Controlled Version:
Color temperature defines the visual tone of light, influencing the ambiance and functionality of your space. Here's a guide to help you choose:
Warm White (2700-3300K):
Provides a soft, inviting glow, ideal for creating cozy and relaxing atmospheres in living rooms, bedrooms, and dining areas.
Neutral Light (3300-5300K):
Offers bright, balanced illumination similar to natural daylight. Perfect for kitchens, bathrooms, offices, and retail spaces where clarity and focus are key.
Cool White (5300-6500K):
Produces a crisp, energizing light, enhancing focus and productivity. Best suited for task-oriented spaces such as workshops, garages, and display areas.
Tip: Select the color temperature based on the activities and mood you want to establish in your space to ensure both functional and aesthetic harmony.
Install on solid brick or concrete. NO hollow bricks or gypsum boards. Ensure wall flatness within 0.5mm error.
Confirm bracket hole positions before drilling. Sizes vary by fixture. Each ceiling plate requires specific measurement for alignment.
Standard Duty: ≤15kg. Heavy Duty: 30-50kg. Fix every 40-50cm. Double-person install required for large appliances.


Chandeliers are a timeless addition to any home, offering both style and function. Whether installed above a kitchen island, a dining table, or in a hallway, Chandelier can transform your space. At Metavaya, we want you to feel confident throughout the installation process. Follow our step-by-step guide, and you’ll soon enjoy a beautifully illuminated room!
Step 1: Preparation
Before starting, ensure you have all the tools and follow safety protocols.
Tools You’ll Need:
Ladder, pliers, wire strippers, screwdrivers, power drill(optional), a drill bit(optional)

Safety First:
Turn Off Power: Shut off power at the breaker panel for the room you’re working in.
Test for Power: Use a voltage tester on the wires or fixture to confirm no current is flowing.
Remove the Old Fixture: Carefully unscrew and disconnect the existing light. Retain screws or mounting hardware, as they may be helpful for the new fixture.

Step 2: Assemble the Chandelier
Lay out all parts and assemble your fixture according to the manufacturer’s instructions.
Organize Components: Spread all parts on a flat surface for easy access.
Pre-Assemble Parts: Attach rods, chains, or decorative elements, and set the hanging height to your preference.
Secure Decorations: Attach shades, crystals, or other decorative elements while on the ground to simplify installation.
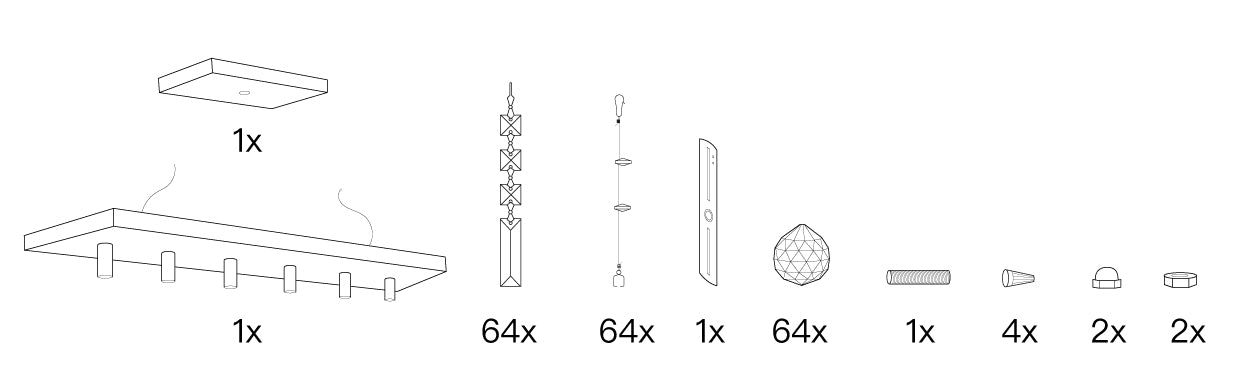
Step 3: Install the Mounting Bracket
The mounting bracket is vital for a stable and secure fixture.
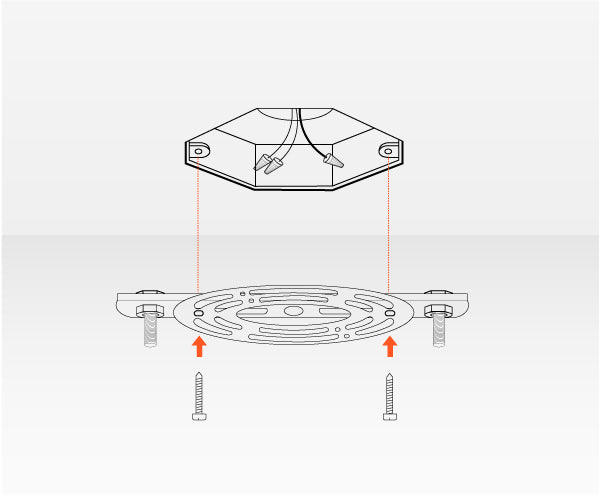
Attach the Bracket: Secure it to the ceiling junction box using screws provided.
Check Stability: Gently pull on the bracket to ensure it’s firmly in place. For heavier fixtures, use a fan brace or additional support.
Step 4: Connect the Wiring
Wiring is a crucial step—take care to follow these guidelines:
Identify Wires:
Black: Live/hot wire
White: Neutral wire
Green/Bare Copper: Ground wire
Wiring Instructions:
Ground Wire: Connect the pendant’s ground wire to the junction box’s ground wire and secure with a connector.
Neutral Wires: Twist the white wires together and secure with a wire connector.
Live Wires: Connect the black wires and secure them.
Double-Check Connections: Tug each connection gently to ensure they are secure and no bare wires are exposed.
Tip: If you’re unsure about wiring, consult a licensed electrician.
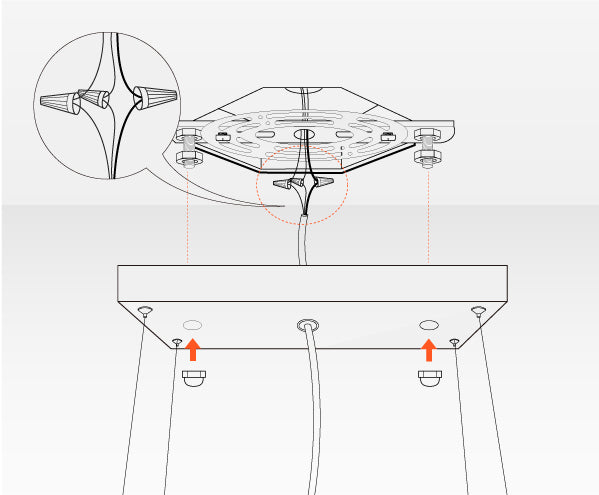
Step 5: Attach the Chandelier
Mount your fixture onto the bracket.
Secure the Fixture: Align the pendant with the mounting bracket and use screws or nuts to fasten it.
Adjust Alignment: Check that the pendant hangs level and at the correct height before tightening fully.
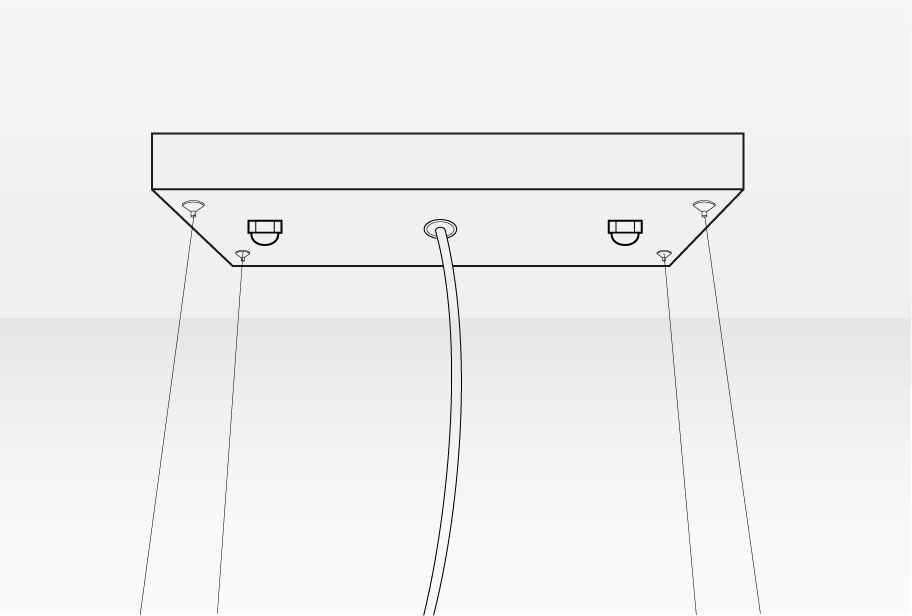
Step 6: Finalize Setup
Add the finishing touches to your fixture.
Insert Bulbs: Use the recommended wattage and type for your Chandelier.
Attach Shades or Covers: Secure any shades or covers not attached earlier.
Stability Check: Ensure all components are secure and the fixture hangs level.
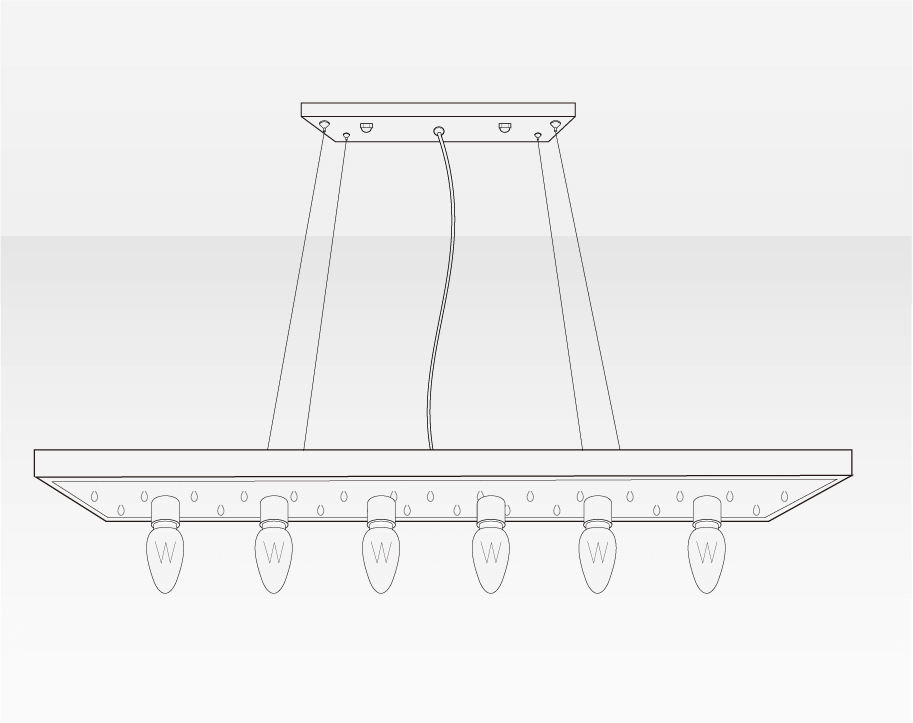
Step 7: Test Your Light
Restore power and enjoy your new lighting!
Restore Power: Switch the breaker back on.
Flip the Switch: Turn on the Chandelier to check functionality.
Make Final Adjustments: Step back to assess height and alignment, and make any necessary tweaks.
Additional Tips for Chandelier Installation
Optimal Heights:


Support for Heavy Fixtures:
Ensure your ceiling junction box and bracket can support the pendant’s weight. For heavy fixtures, use additional reinforcement like a fan brace.
Professional Assistance:
If you’re unsure about wiring or want to ensure compliance with building codes, hire a licensed electrician for peace of mind.
Step 8: Check
Congratulation, you have completed the installation for your chandelier! One last thing to do is to check it from a distant just to make sure that the chandelier is leveled and at proper height. Make additional small adjustment as needed. After ensuring safety, you can turn on your house’s power switch and the light switch for the chandelier. Now you can enjoy the beautiful chandelier that you just installed for your home.
We hope this blog will be able to provide you an overall view about the chandelier’s installation process as well as step by step guidance when you are doing the installation. If you have any questions, feel free to contact us and we are always here to help!
Please be aware that all prices shown on our website do not include duties, local taxes, or any other import charges. In most cases, our parcels pass through customs without VAT being charged. However, for larger orders or certain circumstances, we may need to provide additional information to customs and cooperate with the buyer to supply the required paperwork.
Each destination country has its own import tax threshold, which determines the value of goods that can be imported before import duties are charged. Import duties, taxes, and other charges are not included in the item price or shipping cost. These charges are the buyer’s responsibility, and we are not liable for any delays caused by customs authorities in your country.
For more details regarding applicable fees, we recommend contacting your local customs office.
Dozens of hand-formed glass elements, each with a wave running down its face, overlapped like scales around three tiered metal rings. Ghiaccio is Italian for ice, and the texture is where the name comes from — every element is worked while the glass is hot so the surface crazes instead of being polished smooth. Small bulbs sit behind the glass at several points around each tier, which is what gives the fixture many soft highlights instead of one bright centre.

Everything you need before you order, in one place. Three diameters, eight finish combinations, and a bulb count that changes with the size — check the size guide below before you choose.

| Materials | Metal + glass |
| Glass | Hand-formed ice-textured elements with a wave profile, overlapped around each tier |
| Glass element | Ø 1.4″ × H 4.9″ (Ø 3.5 × H 12.5 cm) each |
| Frame & canopy | Metal — gold or black finish |
| Finishes | Amber · Smoke grey · Clear · Green, each with Gold or Black |
| Small | Ø 17.7″ × H 12.6″ (Ø 45 × H 32 cm) |
| Medium | Ø 23.6″ × H 10.2″ (Ø 60 × H 26 cm) |
| Large | Ø 35.4″ × H 13″ (Ø 90 × H 33 cm) |
| Light source | E12 / E14 small screw base — LED or Edison bulb, not included |
| Bulbs | 6 (small) · 9 (medium) · 18 (large) |
| Dimming | With dimmable bulbs on a compatible dimmer |
| Mounting | Semi-flush ceiling mount, hardwired to a standard junction box |
| Install | Two people and a qualified electrician recommended |
| Placement | Indoor dry locations only |
The drop stays close to the ceiling in all three, so the choice is really about diameter. As a rule, a round fixture reads correctly at about two-thirds to three-quarters the width of the table or the rug it sits over.

Ø 45 × H 32 cm. The one for an entry, a hallway, a landing or a small bedroom — tight enough not to crowd a narrow ceiling, and the deepest drop of the three relative to its width, so the tiers still read clearly from underneath.

Ø 60 × H 26 cm. The most-chosen size: right over a bed, a study, a kitchen or a seating group, and the shallowest drop of the three — 26 cm — which is what makes it the easiest of the three to place under a standard ceiling.

Ø 90 × H 33 cm. Statement scale, with eighteen light points. It suits a foyer, a dining room over a table about 120 cm across, or a stairwell where it is seen from more than one floor.
Over a round table, aim for a fixture about two-thirds its width: Ø 60 cm over a 90 cm table, Ø 90 cm over a 120–135 cm table.
26–33 cm from the ceiling in every size. It clears head height in rooms where a pendant on a rod would not, which is the point of a semi-flush mount.
The form is identical across all eight. What changes is how much light the glass lets through and how hard the metal reads against the ceiling — which together decide whether the fixture is the loudest thing in the room or the quietest.

The warmest of the four and the most opaque. Unlit it reads as honey-coloured stone; lit, it turns gold at the thin points of the wave and stays dark along the rolled edges. Choose it if you want the fixture to be seen.

Neutral and slightly cool, with the ice texture reading more sharply than it does in amber. It is the restrained option — the one that sits with grey plaster, dark joinery and cooler stone without warming the room.

The brightest and the most transparent. The bulbs are visible through it, so the fixture reads as a cluster of small points rather than a glowing mass. Pair it with a decorative filament bulb — here the bulb is part of the design.

Bottle green, almost opaque unlit, warming to olive-gold when it is switched on. The strongest colour of the four and the one that most clearly reads as a material rather than a lampshade.
A warm metal that disappears into the glass, so the fixture reads as one mass of colour and light. The usual choice with amber and green, and with warm wood, plaster and brass fittings elsewhere in the room.
A hard outline that separates each tier from the next, so you read the structure before the colour. The sharper choice with smoke grey and clear, and with dark joinery, steel windows and painted ceilings.
Most ceiling fixtures of this size put one or two large bulbs behind a diffuser, which gives a single hotspot and a hard shadow underneath. This one distributes six to eighteen small bulbs around the tiers, so the light leaves the fixture at many points and from several heights at once. Glass on the upper tier throws light up onto the ceiling as well as down into the room, which is what keeps a ceiling from reading lower than it is. The ice texture then scatters each source again before it reaches the room.

LIGHTS OFFLIGHTS ON
Three rings of textured glass on metal — closer to a piece of cast sculpture than to a light fitting.
A field of small highlights across every tier, with the overlap lines reading as dark seams between them.
Buy every bulb in the same brand and the same colour temperature. With this many sources side by side, one odd bulb is immediately visible from the floor.
The fixture is built as three concentric tiers of decreasing diameter, hung one below the other from a central stem. Each tier carries a ring of wave-profile glass elements, overlapped like roof tiles, so no gap in the ring ever lines up with a gap in the tier above or below it.
Three diameters instead of one means the silhouette reads as a shallow dome rather than a drum. From directly underneath you see three concentric rings; from a sofa across the room you see a stepped edge against the ceiling.
Each element curves across its face, so a single bulb puts a bright line down the middle of it and leaves the sides dark. That is where the faceted look comes from — it is the geometry doing it, not a coating.
Elements lap over their neighbours around each ring, and the tiers are offset against each other, so there is no continuous gap anywhere for a bulb to glare straight through.
The narrowest tier closes the bottom of the fixture, so there is no exposed plate or visible wiring when you look up at it — which matters more on a ceiling light than on anything else.

A floor lamp is read in profile; a ceiling fixture is read from below, usually at an angle, and often from the next room. That changes what a design has to do. Three concentric tiers give the underside something to look at from directly beneath, the stepped edge gives it a silhouette from across the room, and the overlapped glass means there is no angle from which you catch a bare bulb.
Three components make up the whole fixture, and the largest size uses exactly the same three as the smallest. Below, each one at close range: how it is made, what it does structurally, and what it contributes to the light.

Ø 1.4″ × H 4.9″ each, formed while the glass is hot and left unpolished, so the surface carries the fine fracture pattern the Ghiaccio is named for. The wave is formed at the same time, which is why no two elements catch the light identically.

Each tier is a closed metal ring that carries its glass and its sockets together. The three rings hang from one central stem at fixed diameters, which is what holds the stepped profile without any visible bracing between them.

A round ceiling plate with a short stem rather than a rod or a chain. It covers the junction box completely and holds the whole fixture 26–33 cm from the ceiling, which is what lets it work in rooms a pendant would not suit.
The ice pattern is formed while the glass is still soft, so it runs into the body of each element rather than sitting on the surface. A chipped edge would show the same texture and the same colour all the way through.

Textured glass against a flat metal finish. The glass does all the optical work — refracting, scattering and colouring — while the metal does none of it, which is why the two never compete for attention on the ceiling.
The fracture pattern is worked into the glass while it is soft, so it refracts through the thickness of the element instead of scattering at the surface. It is what turns each bulb into a cluster of highlights.
Amber, smoke grey and green are melted into the glass itself rather than sprayed on, which is why the colour reads as depth rather than as a tint and why a chipped edge would be the same colour right through.
Gold or black, with no texture of its own. On a ceiling the metal is mostly seen in silhouette, so it is finished to read as an outline rather than as a reflective surface.
The rolled edges are left exactly as the glass set. They catch a highlight all the way round each element — the detail that only appears once the fixture is lit.
Designed to hold its own as an object, whether the fixture is switched on or off.
A semi-flush ceiling light at Ø 45 to 90 cm suits some ceilings far better than others. Six positions that work, and the diameter to order for each.

Ø 90 cm where the ceiling is high, Ø 45 cm where it is not.

Ø 90 cm over a table about 120 cm across.

Ø 60 cm centred over the bed, not over the foot of it.

Ø 90 cm centred on the seating group, not on the room.

Ø 60 cm away from the hob, where grease will not reach it.

Ø 60 cm for the ambient light, with a task lamp doing the reading.
Every glass element on the fixture is formed, textured, cooled and seated by hand — in the largest size that is three full rings of them. Everything that makes one element different from the next happens in the forming and the texturing, before it ever reaches a ring.

Molten glass is blown or moulded to achieve balanced proportions, smooth contours and precise optical clarity.

Gradual, controlled cooling removes internal stress — enhancing the glass’s long-term strength, clarity and durability.

Edges and surfaces are refined by skilled artisans, creating a clean, elegant finish that catches the light beautifully.

Each fixture is assembled with precision hardware and individually tested to ensure even light diffusion before it is packed.
The crazing runs coarser on some elements than others.
Depth of colour differs element to element across one tier.
Trapped in the glass as it cooled.
The ten questions customers ask most often before ordering a semi-flush ceiling light of this size.
Match the diameter to what the fixture sits over: Ø 45 cm for an entry, hallway or small bedroom; Ø 60 cm for a bedroom, study or kitchen; Ø 90 cm for a foyer, a dining room or a stairwell. Over a round table, a fixture about two-thirds the table’s width reads correctly.
Yes — that is what a semi-flush mount is for. The drop is 26–33 cm depending on size, against the 60–90 cm a pendant on a rod would take. Allow for the drop plus head height in a hallway or under a beam.
Gold warms the glass and lets the fixture read as one mass; black outlines each tier so you read the structure first. Amber and green are the two statement glasses, smoke grey the restrained one, and clear the brightest — with clear, the bulb you choose becomes part of the design.
Ghiaccio is Italian for ice, and it describes the surface rather than the colour: each glass element is crazed into a fine fracture pattern while it is still hot, which is what refracts a single small bulb into a cluster of highlights.
Very close, but each element is formed, textured and cooled by hand, so the crazing, the depth of colour and the odd trapped bubble differ from element to element and fixture to fixture. That variation is the material, not a defect.
Six for the small, nine for the medium and eighteen for the large, all small screw-base — E14 in Europe, E12 in North America. None are included. Warm white at 2700–3000K suits all four glasses; 4000K and cooler greys them and flattens the texture.
Fittings differ by country, the right bulb depends on which glass you chose, and eighteen glass bulbs rarely survive a long shipment intact. Buying locally gets you the right base, the right brightness and no broken glass in the box.
The fixture has no dimmer of its own. Fit dimmable bulbs and wire it to a compatible dimmer and you control the level — check that the dimmer suits the total load of six, nine or eighteen small bulbs.
Hardwired to a standard ceiling junction box with the bracket supplied — no rod, no chain and no plug. Two people and a qualified electrician are recommended; the glass is seated after the canopy is closed.
Switch it off at the wall and let the bulbs cool, then dust the glass with a dry microfibre cloth, using a soft duster for the upper tier. For a deeper clean use a barely damp cloth. Avoid solvents and metal polish, which mark both the texture and the finish.
Contact Metavaya before you order and we’ll work it out with you.